Showing posts with label Our Little DIY Victories. Show all posts

Friday, June 11, 2010

Outdoor Oasis: Patio Room Ready for Summer


outdoor_room_dusk3

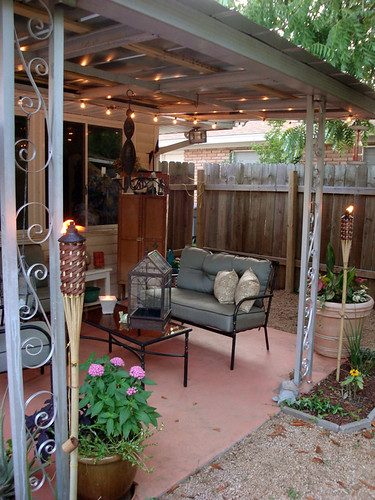
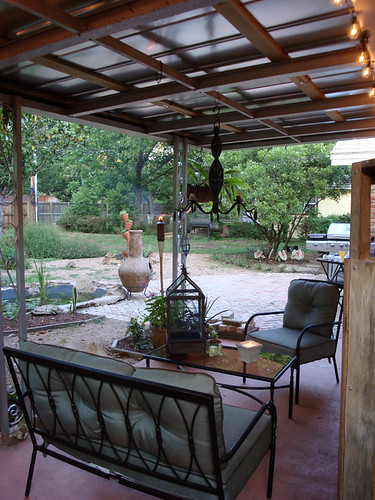
Ahhhhhh, our outdoor living room is nearly complete and we're lovin' it. Over Memorial Day weekend we added some homey touches like tiki torches, new container plantings & cafe-style string lights.

outdoor_room_dusk2

We went with Martha's Pacifica Collection for Home Depot & couldn't be happier with it. It's an amazing bargain (even more so now than when we bought ours; they've recently lowered the price)! The set is well-made, extremely comfortable to sit in, light & easy to move. Plus, the pieces are slightly smaller than most patio sets, which was important for our small space.

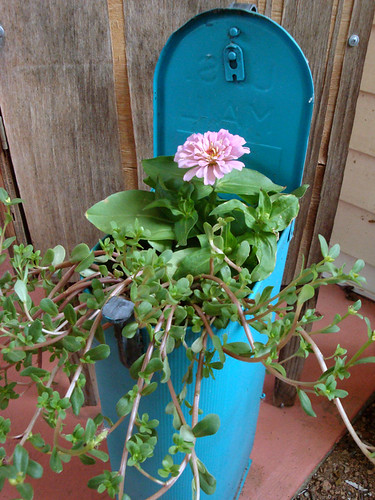
outdoor_room_mailbox

My favorite new container is our old mailbox! Cute, huh?

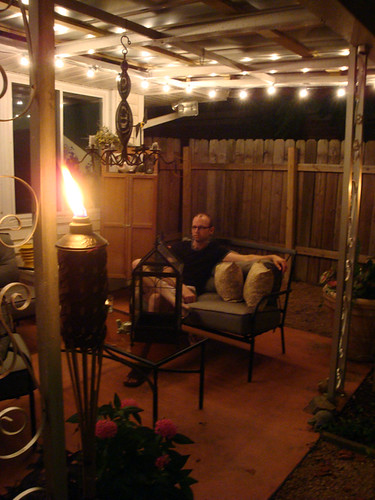
outdoor_room_torch

We love relaxing out here at night, listening to the toads at our little pond croaking (very loudly - kinda embarrassing!). Simple joys!

Check out my Flickr set for all the pics of our outdoor room renovation. What are your simple joys of summer? I'd love to hear about them!

{update 6/14/10: our patio is featured on Apartment Therapy! so exciting! Big thanks to Adrienne for the feature.}


Tuesday, April 13, 2010

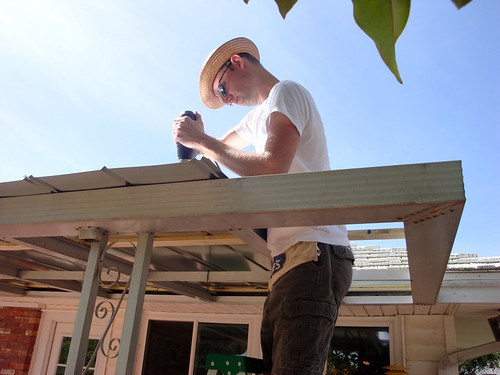
New Metal Roof on our Patio!


metalroof5

Weekend before last Patrick finished installing a new cover on our back patio. It's made of sheet metal & it looks awesome!

before:
coveredpatio_cleared
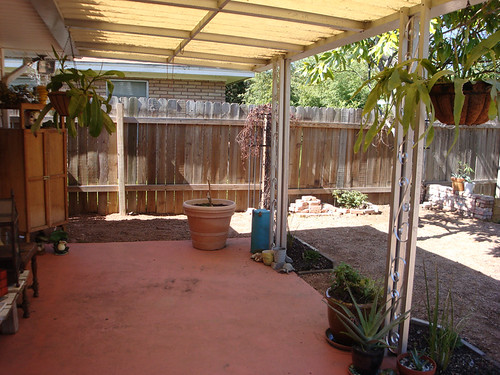
The original cover was made of corrugated plastic that was yellowed & unattractive. Plus, the gutters were no longer doing their job, so the fascia board on the house was rotted out & in need of repair. You can see all the gory details in my outdoor room set on Flickr, if you're so inclined.


after:
metalroof8

We've got it set up with our lovely patio furniture now, too, so we're well on our way to creating our outdoor living room. More pictures coming soon...

What about you? Do you have an outdoor living space, or do you prefer to spend your down time indoors?

Friday, January 8, 2010

Outdoor Oasis: Finished Brick Patio


Our patio extension has been finished since early November, but I'm just now getting around to posting about it. My super-handy husband, Patrick, did all of the hard work himself, and I think he did a fabulous job! He used unwanted antique Chicago bricks from a local contractor, found via Craig's List. In this photo, he hadn't yet filled in all the gaps around the patio's edge, but that's done now.

Here's how this area looked when we first bought the house, just over a year ago:

We've made quite a few changes in addition to the new patio:
  • replaced the windows (as well as those on the rest of the house)
  • sledge-hammered away those humongous rocks around the pond so that it's more integrated into the landscape & less Flintstones-y
  • painted the inside of the pond black so that it almost disappears & looks more like a real pond & less like a teeny-tiny swimming pool
  • removed those mind-bogglingly random pavers from around the pond & re-purposed them in other parts of the yard: the small square ones are now flower bed edging, placed on end & buried deep so that only a few inches of each are visible (it looks really good!), and the others were used to build a retaining wall for our compost piles
  • created the little rock bed with cacti cuttings from my parents' yard & our suspended flower pots (which are now empty save for one - some replanting is definitely in order!)
  • covered the ground with weed-blocking cloth & crushed granite gravel to create garden paths between our flower beds

We designed the patio together (of course I helped out with that - that's the fun part!), but Patrick did most of the work. I did help with the loading & unloading of all of those bricks when we got them from the contractor's site - 700 bricks! That's a lot of bricks. I didn't help much after that, though.

Patrick poured a foundation of gravel and sand and tamped it down, then laid each brick by hand (which ended up being even more than 700; he had to order more).

The last step was the coolest: sweeping sand across the bricks to fill in the gaps. It was mesmerizing to watch. I even swept a section myself; it was oddly satisfying. You start with a pile of sand, then sweep it across the bricks and it falls in between them, neatly filling in all of the spaces and leaving the tops of the bricks clean. I loved that step!

Of course I mostly love that our patio is all finished now. It looks amazing, especially with the shiny new grill we got as a Christmas gift! We've been using it a lot already, and can't wait for it to warm up so we can have friends over & enjoy being out there.

Next step in creating our Outdoor Oasis: converting that boring covered slab into a relaxing and beautiful outdoor living room! Stay tuned...

Sunday, October 4, 2009

"Any Monkey Can Lay Pavers..."


"... it's the prep-work that takes some thinking & planning," says Patrick.


Well, keep up the good work, monkey; we need this patio finished by Thanksgiving! ; )

Monday, September 14, 2009

Stung by a bee, Leg scraped on a rusty stake, & Aching lower back - but so worth it!


I was afflicted with all of those things yesterday afternoon while Patrick & I continued the quest to tame our backyard. It's like Man vs. Wild out there. Sort of. I mean, we didn't have to build our own raft out of twigs or eat grubs or anything, but you know, it's pretty savage. That was my first ever bee sting - it hurt! We spent all afternoon clearing weeds from the center of the yard, putting down weed blocking cloth, then covering it with gravel (crushed granite).

The resulting neat and clean, finished-looking garden path looks great! We will be giving the narrow paths that cut between the flower beds the same treatment eventually. Side note: You might remember those flower pots from this post a while back. I'm sad to say that they have not fared well in this summer's drought. Or to be more blunt, everything in them has died except for the sedums in the second pot! {Note to self: plant more sedums in the other pots.} However, looking on the bright side, the cacti cuttings we took from my parents' house are doing extremely well, and the Mother of Thousands is living up to her name.

This is what the area looked like right after we cleared the weeds. I neglected to get a picture of the weediness, but just look at that area around the bbq pit there; it was pretty much like that, very green and lush since our record-breaking drought has finally come to an end, but all weeds. And it's now pretty much all mud too, since we had a torrential downpour on Saturday. Our goal is to minimize the yard (or the mud & the weeds, that is) by making big flower beds with paths in-between, and only having a small side yard on the right. We plan to seed that with Turffalo someday.

This is the view looking back at the house, where Patrick is extending our patio with antique Chicago bricks he found on Craig's List. It's going to look so cool, and be quite useful, too. Please ignore that pea soup in the pond - we're still working on that.


This kind of stuff sure is hard work, but it definitely gives you a feeling of pride and accomplishment. Just look at what we were up against when we bought the place last December:

What the heck was going on with all of those pavers?!! We're still trying to figure that out. But hey, they've made great path edging and a retaining wall for our compost pile in the back!

Wednesday, August 19, 2009

Kitchen Cabinet Remodel!


Welcome to the kitchen of the little old house I share with my sweet husband, Patrick, & our crazy cat, Pooky. We love old houses - they're full of charm & interesting details that you often don't find in new houses, like built-in hutches & bookshelves (I adore built-ins!). Our house was built in 1955 and has undergone pretty extensive remodeling (by previous owners), that has brought it up-to-date while still maintaining most of the home's architectural integrity.

The kitchen is really cute, with large windows & a new island in place of the original wall that has since been removed, making the kitchen a lot more spacious & open. I like spacious & open. I also like lots of cabinets, which our kitchen has. There are some things about these cabinets that I really dislike, however.

For instance, the layers of glossy white paint covering every surface of each cabinet are quite annoying. When you reach for a glass, you have to actually tug at it because it will have stuck to the paint on the shelf! ick. The painted surfaces also ensure that the big solid wood doors on the cabinets do not shut properly and often hang open slightly. Or if they do shut all the way, then you have to pull extra hard to dislodge them from the overly-painted surfaces.


And then there are the lovely extras left behind from pre-cellphone days, which you can see hiding behind the glasses there.

So, we've been wanting to do something about these cabinets for a while, and this past weekend we got started on it. All of my wishful gazing at beautiful kitchens in magazines & on blogs inspired me to do a low-cost, high-impact remodel of our wacky cabinets.

First off, Patrick removed the cabinet doors & I gleefully set them aside. Then I removed all of our dishes & he yanked out that telephone wire...


So what did we do next? What's our big plan for this little kitchen? Stay tuned...

Tuesday, June 16, 2009

Wednesday, April 22, 2009

What's Growin' On: Suspended Flower Pots


Happy Earth Day!

On Sunday we went on a plant shopping spree at one of our favorite locally-owned nurseries, The Natural Gardener.

The cute little 1955 house we bought last December came with quite a blank canvas in the back. So we have a TON of ongoing gardening projects, which we'll be blogging about in the What's Growin' On? column here.

We used those colorful flowers on the bottom rack of the cart to make this potted plant stand, which I am quite proud of. I can't stop staring at it from my kitchen window.


It was super-easy to make, too. You just thread some terra cotta pots onto a piece of re-bar (we actually used a piece of metal conduit, but I wouldn't recommend it; re-bar will be much more stable). Use a hose clamp to hold the bottom pot where you want it. Sink the pole into the ground 12 - 15 inches for stability. Then comes the fun part: filling 'em up with pretty flowers and stuff! We put drought-tolerant sedums on the top 2 levels, and thirstier flowers on the bottom where they'll benefit from the overflow of water from the upper pots.


Admittedly, we stole the idea from similar pre-made pot stands for sale at The Natural Gardener... but seeing as how we are regular customers there, I'm hoping they won't mind. ; )


What's growin' on in your garden? Tell us about it in the comments below, with links to photos if you have some. We'd love to see!
Blog Widget by LinkWithin