Showing posts with label In My Work Room. Show all posts

Thursday, December 2, 2010

Little Tweed Owls


owls_pairoffaves

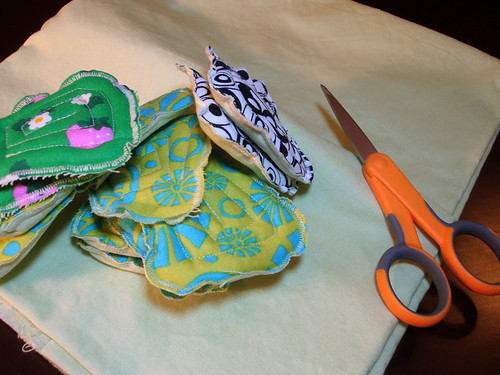
So I've been working on something new & super-cute, if I may say so myself.

owls_process1

owl_plaid_brown
This little guy is waving hello - awww!

and I just love Mr. Green Wings on his mod background:
owl_mod_green

What do you think of my newest creations? I'm working on a couple of other animals, too, but the owls are all I have done so far. I'll have these little cuties for sale in our WonderCraft booth tonight at First Thursday on South Congress, tomorrow at The Bleet-Up & next week at Cherrywood Art Fair. Hope to see you at one of these craftabulous events!


Monday, October 11, 2010

Bits & Pieces


a box of colorful ears...

stuffed & waiting by my machine to be spiral-stitched for that adorable quilted effect! This is perhaps my favorite step of elephant-making.

and a stack of embroidered faces on what will become the elephants' bodies.

I love seeing the pieces at different stages & watching a batch of toys come together from a stack of parts. These polka-dotty elephants will soon be getting some national attention! Can't wait until I can tell you all about it!


Tuesday, September 21, 2010

Work in Progress: Turtle Mania!


Just a quick peek at what I'm working on right now. Hopefully I'll have a finished version to show you very soon! Like maybe tomorrow, if things go well. Stay tuned...


Sunday, September 12, 2010

Someday Projects are now Sunday Projects


I've started a new thing in my work room that I'm calling my "Sunday basket." The idea is that I will keep an ongoing project in this basket: sewing, painting, a photo album - anything that I am working on purely for myself. Or it could be a gift for someone else, but it is most definitely just for fun & not for my business. The projects that are stowed in the basket will be my Sunday projects. I can spend all day on Sundays working on them if I want to - I'm giving myself permission to do that, and promising myself that I will refrain from doing anything work-related on Sundays. I can work on them whenever I feel like it of course, but knowing how busy my weeks are, I probably won't. But at least by saving Sundays for these personal projects I can realize some of those projects I keep telling myself I'll get around to "someday." Someday is today!!!!!!!

There are tons of things I've wanted to sew for myself (I envision a whole new wardrobe of skirts, tops & dresses) & I'll even go so far as to buy the patterns & fabric, but then I have a really hard time completing them. And then there all of those cute little one-day projects I always see in my Craft newsletter, like making bags from vintage pillowcases. I have a beautiful vintage pillowcase I thrifted about a year ago for just such a project waiting patiently on the shelf of my linen closet. Lots of other stuff I've been wanting to do just for fun, too, like collage a wall of my work room or go to more art galleries & museums, but I always seem to find myself swamped with work for my various small businesses. But I'm learning lately that in order to stay happy & inspired I really need to make an effort to carve out time for these things that I want to do, even though I always have a list a mile long of the things I "should" do. So here it is, typed out & posted to the interwebs for all the world to see: I'm taking back my Sundays!

More about what's currently in my basket in a future post...


Wednesday, August 25, 2010

A Look at My Messy Desk


desk3

Here's what's been accumulating on my desk lately: a giant jar of recycled wool stuffing, a refreshing glass of root beer, a plethora of needles & scissors...

desk1

a huge pile of fabric scraps (which I save for use in future toys and fabric collages)...

desk2

and this adorable parade of toy elephants in various stages of stuffed-ness!

Thursday, July 8, 2010

Snuggle Herd Mystery Revealed!


elehpants_polkadot

All of you who guessed "elephant ears" were correct, and Meredith, you are the winner! I will contact you later today about your prize, a set of my "Say What?!" coloring cards. I was very amused by all of the creative answers - thanks for playing, everyone!

elephants_basket2

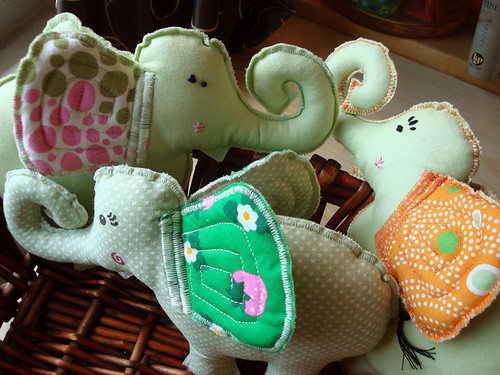
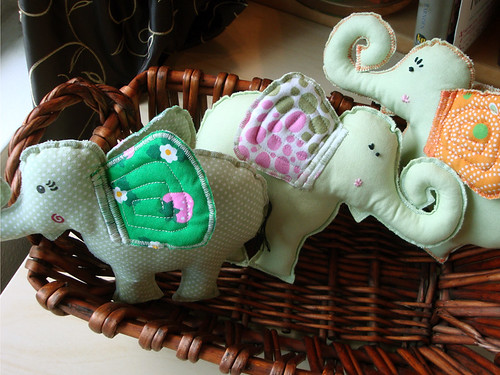
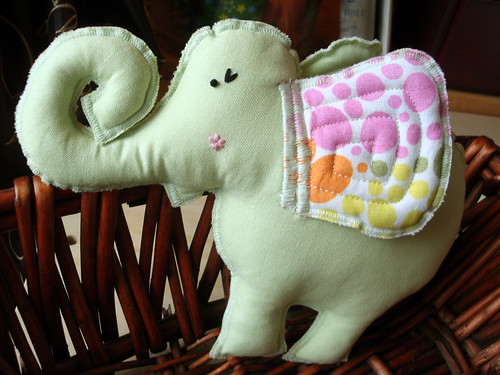
I've been working on a slight re-design of Elsa the Elephant, so it was sort of a trick question! The ears I'm making now are quilted, so they look a bit different.

elephants_basket1

The material I'm using for the body is now quilter's cotton instead of upcycled t-shirts. Using cotton allows me to skip a couple of steps & make them more quickly & easily. However, I think I may still keep making the t-shirt ones as a "luxe" type of item because they are sooooo cuddly soft, and I like the re-use aspect. I'm going to be using many vintage & re-purposed fabrics for these new cotton ones, too, to keep them earth-friendly.

elephants_spotty

I hope to have these new elephants listed in my Etsy shop soon. Also working on a few other super-cute animals... stay tuned!


Monday, July 5, 2010

Snuggle Herd Sneak Peek & Contest!


SH_parts_stack

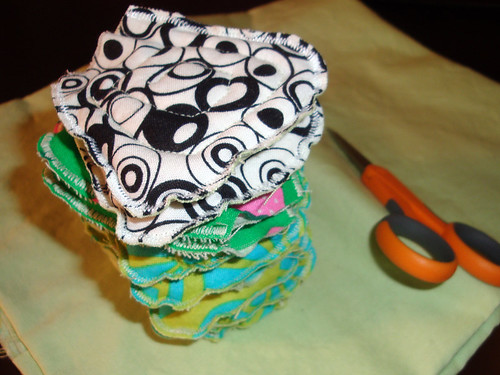
Can you guess what I've been working on???

SH_parts

Ok, I'll give you a hint: it's a body part. But can you guess what part it is & who it belongs to? Leave your answer in the comments for a chance to win! I'll send a special gift to one lucky person, drawn randomly on Thurs, 7/8 at 10am from all of the correct answers.


Saturday, June 26, 2010

Art Waiting to Happen


easel_deerplaque

Oh, the (almost) blank canvas - sooooo much potential! It's an exciting part of the artistic process, I think. I like to let my ideas simmer, so sometimes I prep my canvas & then wait a bit before starting the main subject matter, as I've done with this garage sale frame here. I've painted it my fave shade of peacock blue & added a two-tone fabric background & some cute trim on the inner edge. Now it's just waiting for my next fabric collage to take shape! I'm thinking about creating a Charley Harper-esque bird, inspired by the recent Shout-out to Charley Harper on Craft.


Oh, and what's that dear little deer, you ask? Take a closer look.

deerplaque

It's a crazy-cute, lacquered deer plaque I found at a thrift store. Isn't it cool? I thought it was so cute, but just in need of a pop of color & some texture. I'm going to add some fabric collage on top of it, without covering up the deer. I'm imagining a kind of fabric flower & tree forest, with a tiny little bird or two. What do you think?

Thursday, April 8, 2010

MADE: Little Giraffe Fabric Sculpture


smallgiraffe_blue


I made something new yesterday! I'm loving creating fabric sculpture with the help of my new favorite craft product, Fabric Mod Podge! It's a fun way to use up scraps in your fabric stash. Trims, buttons & beads also make great additions.

I wanted to make a tutorial out of this, but it's more of an intuitive process than a step-by-step, and I wasn't very thorough about the photo-taking. But I'll share some pics of my process with you, & if you enjoy sculpting, just go for it! There's no right or wrong way to do it.

giraffe_step1

The Fabric Mod Podge acts as a glue & sealer in one, and it's specially formulated for use with fabric; regular Mod Podge will not work as well for a project of this nature (trust me; I've tried it). I use a small foam brush for most of the application and old junky paintbrushes for more detailed work. It's also good to use a wax paper-covered surface to work on if you want to protect your table. I've made a small, portable work surface by covering a piece of cardboard with wax paper & taping it on the back.

First, I coated a piece of checkered fabric with the Fabric Mod Podge (FMP) to serve as my background. I have found through trial & error that your finished piece will look better if the background material is coated. During the creation of your masterpiece, you may get some unintended gloops of FMP here and there that look messy on an otherwise uncoated piece of fabric. But if you coat the whole thing, they will just blend right in!

When that coated piece of fabric was mostly dry, I used a bit more of the FMP to glue the fabric to a piece of bristol board. Then I attached my first piece of brown fabric for the body of the giraffe. It was an irregular oval-shape piece that I rolled into a tube & glued the bottom sides down. You can see in the photo above that I also brushed some FMP onto the top side of the body in one area, to make the fabric stick to itself. I just wanted to get rid of some of the puffiness of the tube, but didn't want to completely lose the 3-D quality of the rolled fabric.

giraffe_step2

Then I glued down a piece of twill tape I happened to have alongside the body to create the giraffe's mane, tucking it under the body. Almost any kind of trim, or even a contrasting fabric, would make a cute mane.

The next step of attaching a second piece of fabric for the head is where it starts to get trickier. I attached the fabric in a small spot that I knew needed to be glued down, then played with it a bit. I like to practice a few different folds & twists to see what I can come up with before gluing the rest down (being gentle with the fabric & not pulling too hard, because it does take a few minutes for the glued area to dry). You just have to go with the flow, enjoy the sculpting process & try not to get frustrated.

giraffe_step3

So I folded the piece down & attached it with FMP to create the giraffe's jaw line. Then I did a twisty-foldy maneuver to create his head & one ear, which I neglected to take pics of. It was kind of difficult, because I was holding & folding with my left hand & gluing with my right - sorry!  : )

giraffe_step4

Here's the head & one ear all folded into place & glued down. I folded the mouth part under & created a rounded edge to it. I also added spots cut out of a cute floral fabric. I had coated these with FMP & let them dry before gluing them on (mainly because of that mess factor I mentioned when talking about the background - they just blend in better if coated).

I like to keep some of the fabric un-coated though to create some textural contrast between the stiffer, shinier, coated fabric & the fabric in its natural state. You can see that parts of the head & body are left uncoated - they have a softer look to them.

Again, I neglected to take pics of the final steps, but here's what I did:
- made the other ear out of a small piece of fabric & glued down
- cut a small piece of coated polka dot fabric for the muzzle
- rolled 2 little horns out of the same polka dot fabric (uncoated)
- glued on a button eye
- cut off excess mane & body fabric hanging at the bottom
- framed it in a thrifted picture frame that I had spray painted blue & voila!

Have you tried Fabric Mod Podge yet? If so, what did you make?


Wednesday, March 10, 2010

Bunnies.


BetsyBunny_v2

It's really feeling like Spring around here, so it's high time to get some bunny things out into the world! I first mentioned my new Betsy Bunny design back in December, and I was all excited about being "ahead of the game."

yeah... and now it's March and I'm sitting here with a huge pile of half-finished bunny clothing in my work room! I did have a few bunny shirts & onesies in the tote full of stuff I took to The Oasis gift shop last Friday, so there's that to feel good about. At least I haven't been totally unproductive!

My brain just keeps spinning around with thoughts like, "oh my gosh; it's already March! I've got to get the bunny stuff listed in my Etsy shop & out to the boutiques I consign at right away!" Like I won't sell any of them otherwise & then I'll be left with a huge pile of bunny stuff nobody wants come May. Is this crazy of me? Do you other crafters out there suffer from this same kind of self-inflicted hysteria? Do people buy bunny-themed stuff after April? Someone reassure me that the world won't end if I don't get these bunny things done today. Please. Because I really don't feel like finishing them today...

But, lest you all think I'm a lazy good-for-nothing, I have also done a cute little bunnies coloring sheet for the activity book I'm (still) working on. You can download & print it for your favorite little artist!

coloringpage_bunnies

And I've been meaning to put that image on some coloring cards as well... geez! So much to do, so many distractions!


Monday, February 15, 2010

Weekend Ink Sketches


Over the weekend I did some playing around with brush & ink, my favorite medium these days. I was mainly experimenting to see what kinds of textures & varying sizes of brush stroke I could create by "letting the brush do all the work," as they say in art classes.


Coming up with some patterns that can be used here and there as borders & embellishments was my main goal.

I gathered some scrapbooking papers & this photo of a bullfighter's costume from National Geographic & taped them into my sketchbook for inspiration.


I'm feeling pretty productive lately - been working on my kids' activity book & got 2 more pages done! I'll post about those soon. Hope your Monday is off to a great start!

Friday, December 18, 2009

Introducing Betsy Bunny


Tah-dah! It's still December & I've already got a product for Spring! So excited about this - I'm actually ahead of the seasons for once! Earlier this week I decided to schedule a block of time every Wednesday to work on a new product idea for The Snuggle Herd. I have sooo many ideas in my sketchbook just waiting to come to life that I really want to get moving on, but I never seem to progress beyond the initial sketch or idea. I'm so proud of myself that I stuck with my goal & actually made something new this week!

So how did I manage to accomplish this in the middle of what is perhaps the busiest week of the year, you ask? Simple: My internet has been down for 2 days. It's been really frustrating because I usually spend most of my mornings sending & replying to emails, reading my favorite blogs, skimming Facebook & scheduling things on my beloved Google calendar - and of course, checking back in on all 4 throughout the day. So it has been quite difficult to deal with this technical blip, but it has allowed me to be way more productive than usual, seeing as how I usually spend my mornings sending & replying to emails, reading my favorite blogs, skimming Facebook... you get the idea.

Here's my original sketch. The applique turned out a little differently, with the nose/mouth area much smaller in relation to the head than it is in the sketch. I can't decide which I like better - the smaller nose, mouth & teeth of the embroidered design, or the larger face that takes up more of the head, as it is in my sketch.

What do you think? Please let me know in the comments; I'd love to ge
t some feedback!


Tuesday, October 6, 2009

Behind the Scenes: Make-shift Photography Studio


Product photography is all about illusion. Have you heard about all the crazy things food stylists do during a photo shoot? We're talkin' ice cream made of mashed potatoes, milk that's really glue, and lots more truly weird food substitutes like motor oil & cotton balls. Well, thankfully I don't have to worry myself with that kind of stuff, but we do have an illusion of sorts going on in our Snuggle Herd photo shoots. Check out the setup:

This is Patrick's office. He sets our backdrop (2 drawers from my nightstand) up on his desk. For a cute clothesline look, we hang the clothing on a satin ribbon, which is clipped to the top of the drawers. A piece of brown fabric on the desk and lots of clamp-on lights round out the scene.

Thanks to the magic of PhotoShop - some major cropping, a little adjustment of the levels & color balance - we get a pretty nice lookin' photo out of all of this! Funny, huh? We're living proof that you can take decent photos of your work all by yourself. There is a lot of help available online, too. This Storque article on feature-friendly photos is a good place to start.

It's also worth it to take some time to learn how to use your photo-editing software to brighten your photos if you're lighting is less-than-perfect (as ours certainly is!). This very helpful article on the Switchboards talks about editing in PhotoShop and building your own light box in a Rubbermaid container. I tried that for myself & it worked pretty well, but most of my products are too big to use with it. It might work out well for you if your work is small, like jewelry.

Hope you've found some interesting information here. If you have any other good photography tricks or resources, please leave them in the comments!

p.s. All of these new baby blue items will be listed in the Snuggle Herd Etsy shop very soon!

Friday, October 2, 2009

Progress in My Work Room


Gettin' stuff ready to take to the lovely Sanctuary boutique in West Austin. Back to work - most of these little animals still need faces! Plus, I just found out I've been accepted to the Cherrywood Art Fair, so that means I really need to get busy!

Friday, April 17, 2009

Photo Styling... Which Do You Prefer?


This pic of Zandra was featured on the tchotchkes blog today, in a great post called "Storytelling Photography." Soulyluna, the writer of this blog, has a wonderful biz called Treebottom Wool. They make the cutest little kids' clothes, using "luxuriously soft cashmere or other itch and scratch-free wool made from re-purposed sweaters." They also "fancy unusual applique designs, vintage buttons and collecting pockets." Their stuff is really cute & unique, and so full of imagination.


When a fellow whimsical-stuff-maker like Soulyluna writes nice things about my photos, it's very flattering of course. But it's also been a little unsettling... Self-doubt is creepin' in & it's got me wondering about the new direction I've taken with my photos. Patrick's been re-shooting all of the toy pics so we can phase out these old ones with the painted background scenery. Personally, I like the new photos' look so much better than the old ones. I do like the old photos, especially how the backdrop is not the natural setting for these animals (giraffes & elephants in a grassy field among trees whose trunks looks suspiciously like oaks). In my mind, the imaginative setting of the pics sets the tone that these are toys meant to inspire creative thinking. And I guess that's why Soulyluna likes them, too.


But there was always something that annoyed me about those photos: the setting looked too unnatural, as in not organic or healthy. The watercolors I used to paint the grass in the backdrop ended up looking too blue (which made it really difficult to achieve the right color balance in the pics) & the shiny Astroturf used as a stand-in for grass is as unnatural as you can get.

Those old photos didn't seem to hit the right note for The Snuggle Herd, which prides itself on being earth-friendly. I wanted photos that played that aspect up, with a warm, inviting look to them that amplified the animals' soft & cuddly-ness (as opposed to the strange, fake look the painted background & Astroturf have that seems to say "you better keep your distance").


So we decided to use softer, natural materials like wood (drawers from my night stand) and fabric with warmer tones. As an added bonus, this modular drawer setup makes it much easier for us to accommodate products of different sizes and different display situations. We can hang the onesies, lean things up against the drawers, etc., while still keeping a consistent look to the photos, which I think is really important for branding our shop.


But now I'm totally curious, which do you prefer?

Tuesday, April 7, 2009

Hey, is my mouth too low?


That's what Max is wondering, I bet. And I'm thinking: yes. Yes, Max, you're mouth is strangely low. Why is it way down on your neck? Come to think of it, you don't really have much of a neck at all, poor guy.

These are the kinds of details I've been working out with my prototype monkey toy over the past couple of days. I'm trying to finish a few to take to the Austin Handmade Market. Seeing as how it's only a few days away, I should probably quit playin' on the interwebs & get back to work. Will post more pics of Max soon(with a perfectly cute face & a neck). He even has a little girlfriend, Molly.


Blog Widget by LinkWithin